Importing a GPX-file via SDcard
Now that the basics are out of the way, let’s import some caches! As to how to obtain a GPX-file, this is explained in the chapter Obtaining a GPX-file. One way to import your data is via the SDcard. Connect your android-device to a computer via the USB-cable and share your SDcard.
Now copy your GPX-file onto the SDcard. You can put it anywhere you like. The fastest choice, though, is to put it into
After copying the file, disconnect your SDcard from the computer. GeOrg can only access the SDcard if it’s not currently connected.
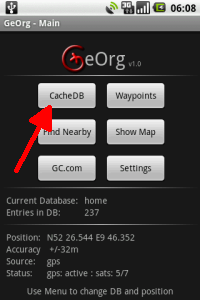
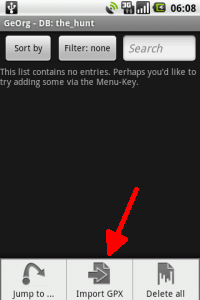
In GeOrg you can import a GPX-file from the CacheDB-Page. Go there now – you can use the CacheDB-Button from the Main-Page. The CacheDB is still empty, but we’re going to change that now. Press the MENU-key and choose “Import GPX”.
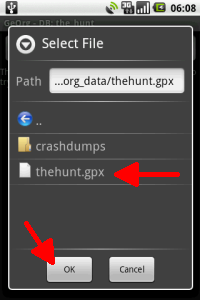
You will be taken to a file-selection-dialog. Look for your GPX-file within this dialog, click it and confirm your selection with “OK”. Your data is now imported into your CacheDB.
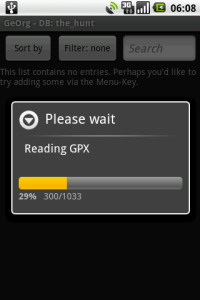
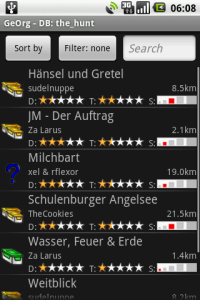
After the import is done (it may take some time depending on the number of caches in your GPX-file), you will be taken to your CacheDB, now showing your imported data.
Next topic: Importing a GPX-file via mail …